Learnyst Website Builder – Advanced Features
- December 24 2015
- Ranjan
Learnyst Website builder is one of its kind which helps you build a great e-learning website for your online school. You don’t have to write code. 90% of the website is ready for you as you signup. You just have to type in the relevant information about the school, fill in its details like features, contact info etc.
Learnyst Website Builder: Exploring Advanced Features
For more details, below is the link to the step by step guide to build your own e-learning website with Learnyst. http://blog.learnyst.com/2015/06/04/build-your-elearning-website-with-learnyst/
Learnyst site builder has some advanced features which can bring in added advantage to your website. So, assuming that you have gone through the above link and have already built your website, lets to move on to see how to add these advanced features too.
Login http://www.learnyst.com as admin and go to site builder by clicking on BUILD YOUR SITE in Admin dashboard.
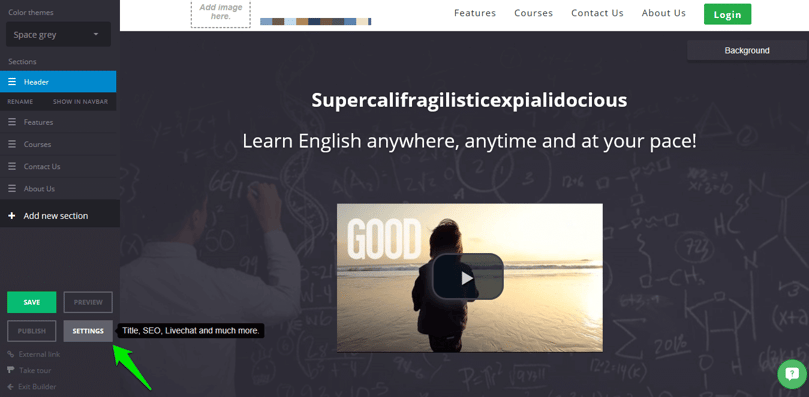
Step 1: In Website Builder click on Settings button
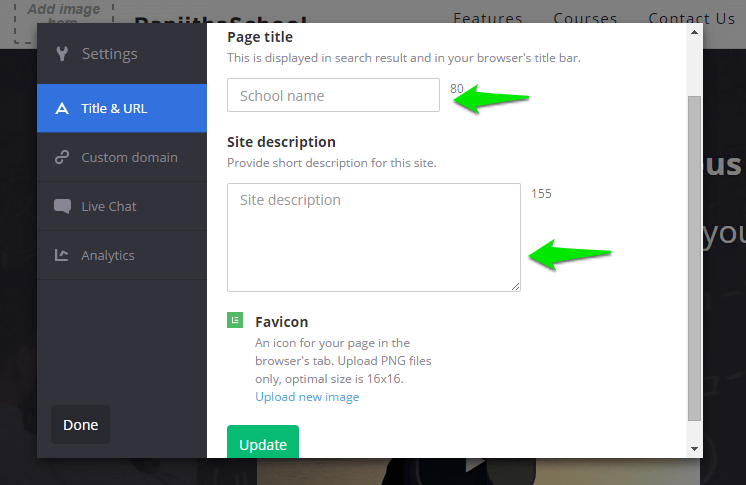
Step 2: The school name that you give in Title field is the one that comes up in internet search results and in the website URL. So you might want to select a good name to be displayed in search results. Also, give some brief description about your site.
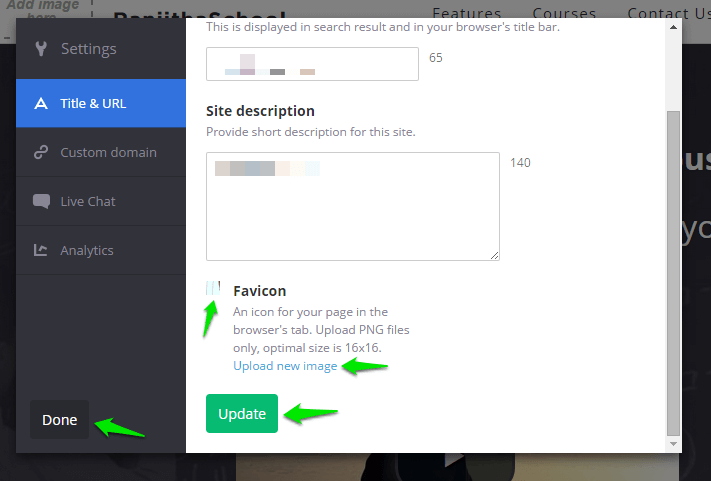
Step 3 : Favicon is the small icon for your page in the browser’s tab. Lick on Upload new image, select an icon from the Learnyst default image library or upload new image or browse from your already uploaded images and set an image as your site’s favicon.
Step 4 : Once your image is successfully uploaded you can click on Update button. You can view the image uploaded. Click on Done. Once you publish your site you can see the image updated in your browser page tab.
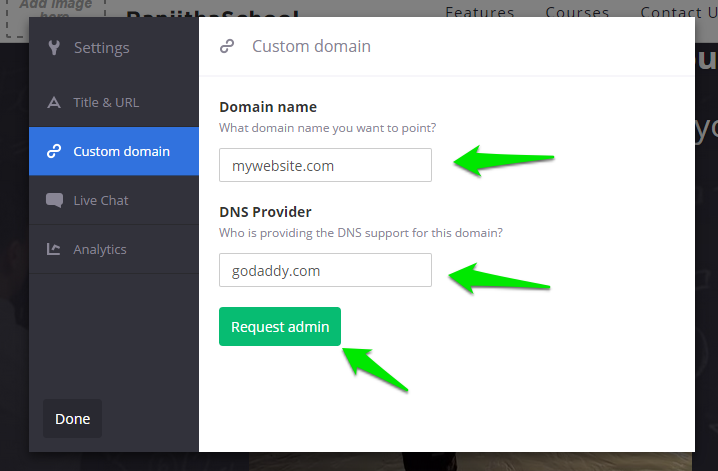
Step 5 : Domain name and DNS Enter what domain name you want to point to and who is providing the DNS support for this domain. Once you enter click on Request Admin. A request will be sent to the admin and admin would contact you regarding the same.
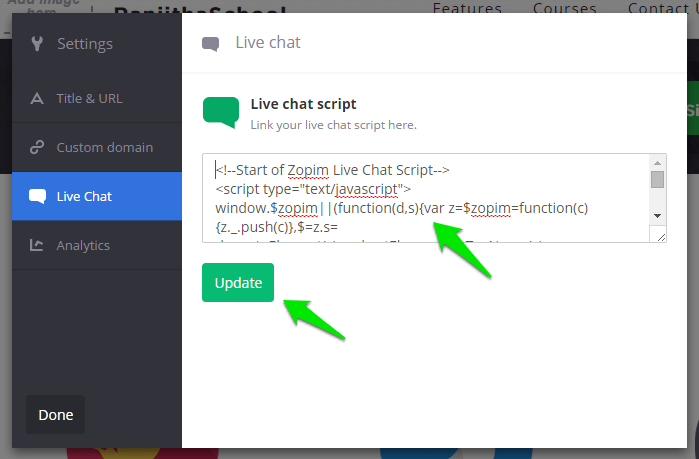
Step 6 : You can register to some live chat websites like http://www.zopim.com for example. Login into zopim.com and go to Widget. You can copy the chat script from there and paste it in Live chat script as shown in the image. Click on Update after copying. This will add a live chat interface to your website on publish.
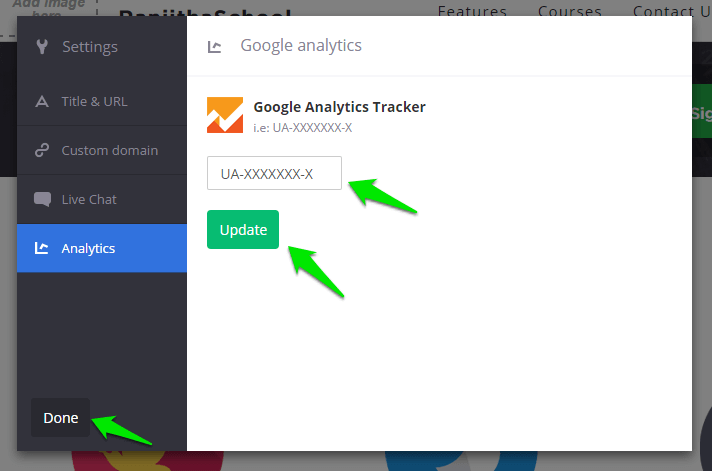
Now that you have added all advanced features click on Done. Then click on Publish. Preview your site to see all these advanced features on your website.


Leave your thought here