
Video is one of the best, if not, ‘the’ best content channel to engage with your online audience. A study by Cisco claims that by 2022, videos will account for over 82% of all internet traffic.
Going by recent trends, it is safe to predict that the share of lecture videos on the internet will only increase. This makes it imperative for online academy owners and lecturers to create videos that will make them stand out in an ocean of video content – quality is everything.
For this, you need to have the right set of equipment and software, and above all, you should know how to build an engaging story around the topic you want to teach. This blog discusses everything to you need to know about creating video lectures that will help deliver the message perfectly and keep your students engaged.
Equipment required
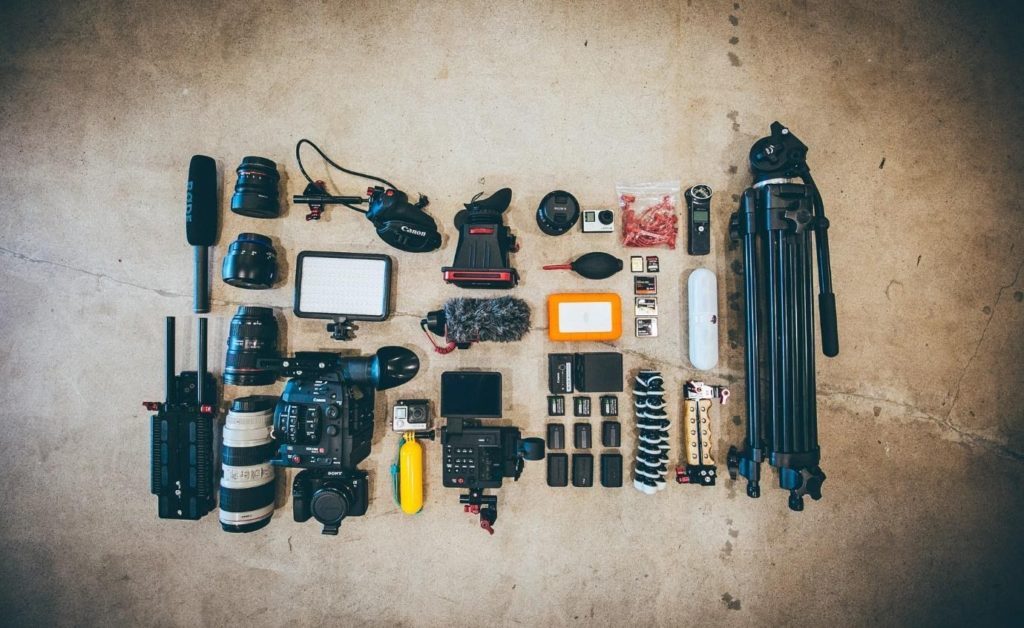
You can’t create good video content without the right equipment. Your video will be an amalgamation of multiple kinds of video formats – parts of it can be screen recordings, and parts of it can be footage shot with a camera. Here is a list of equipment that is a mandate for creating high-quality lecture videos:
- Video Camera: You can’t create a video lecture without a camera, and you will need a good one. But that should not tempt you to spend a fortune on a high-end DSLR to create HD videos. You can use a standard camera that supports 1080p recording. Or you could even use your smartphone to do the job instead.
- Lighting: Having a good camera is just one thing. You need consistent lighting to make your videos look professional. It is advised to shoot using natural sunlight as not only does it save you money, it will also be more comfortable for you. Also, most people don’t like having a source of light directly facing their faces.
- Microphone: Nobody would watch a high definition video if it’s audio sounds like a phone call with two bars of reception. The audio quality compliments the video. Although your camera has a microphone, it will not deliver the quality that you would want. Consider getting a shotgun microphone. It will only record audio from the direction it is pointed at. Or get a lapel microphone that you can clip on to your clothing.
- Tripod: The above three are the essentials. But also get a tripod for the camera/smartphone you will be using. A tripod will ensure the stability of the recording device as per your adjustments.
Software required
A lot happens between the time video is shot and the time it is uploaded on your website. You’ll have edit it to perfection, adding in other video snippets like slides and supporting text. This is where a suite of software comes in! To never compromise on quality, you have to invest in a premium video editing software. Below are some of the best video editing tools that online tutors can make the most out of.
- Adobe Premiere Elements: This has been the leader in the video editing space for many years. The ‘Guided Edits’ feature makes it one of the most attractive options for beginners.
- Ezvid: This tool lets you capture everything on your computer screen. It also lets you edit the recorded video by splitting the recording, inserting text and audio, and even draw directly on the screen. You can save the video for later or directly upload it.
- BlueBerry Flashback Express Recorder: This tool allows you to capture your screen while also recording on a camera. The user interface is simple, and it hosts multitudes of features that will let you edit videos like a pro. You can choose which part of the screen you would like to record and review your recording frame by frame.
- Rylstim Screen Recorder: Apart from capturing your regular screen activities, this also allows you to record other events like right and left clicks. It has a clean and intuitive user interface but supports multiple CODECs. You can also customize the video frame rates.
- Krut: This is a screencast software that runs on almost all operating systems and requires Java to run. It has just three simple features – Record, Snap (pictures), and an arrow button used to adjust borders of the recording area. This can also be used to record streaming video and audio.
- CamStudio: This allows you to record your screen and audio in AVI and SWF formats. It also allows annotations such as text and call out inserts; which should be set before recording sessions. You can do some basic editing like compression, changing frame rates/quality, and time-lapse.
- Webineria: This lets you create “picture in picture” videos by combining your webcam stream over your screen activity. You can choose from 5, 10, and 15 frames per second and outputs can either be in AVI or FLV.
- Screen-O-Matic: This comes both as a web-based application and as downloadable software. It is one of the easiest tools to use as long as you have Java installed. It also features free video hosting and allows you to record your screen and also to use a camera.
Environment required
The environment in which you record (and include) in your video tutorials also play a huge part in the quality of the final output. We have already seen the importance of lighting. Let’s look at some other basics of an ideal environment.
- Location: You may have to jump between locations depending on the topics you are teaching. You may have to take a stroll through the garden if you’re teaching Botany, or you can stay indoors if you’re teaching math.
- Sound control: Make sure the environment does not have too many audio disturbances. If you’re recording outdoors, use a shotgun microphone to record only the sounds you want to record. If you’re recording indoors, reduce echoing in the room by using carpets and other dense items (not wood).
- The background: Try to keep the background as minimalistic as possible. Anything flashy will deviate your student’s attention. Although a solid background is recommended, you can use something like a board which also doubles as an aid to help you teach better.
Tips to talk in front of a camera
There are some etiquettes to record a professional lecture video. It could take some time for first-timers to get adjusted, but with enough practice, you will be on your way. Here are some tips –
- Get comfortable hearing yourself by talking to yourself. You can do this while driving or when you’re doing your usual things around the house.
- Dress properly. This doesn’t mean you have to suit up. Wear something that you’re comfortable in and is also presentable. Also, do your hair and maybe even put on some makeup if you have to.
- Don’t keep a straight face throughout the video. Smile more because people will find you more trustworthy if you do. Also, keep eye contact with your camera lens.
- Talk as if you’re talking to one person. This will make your video more engaging.
Related Blog: How To Take Online Classes In 7 Steps – A Comprehensive Beginner’s Guide.
How Learnyst can help you share your lecture videos securely.
You’ve spent all that time and effort to create the perfect lecture videos. The next step is to make sure that they are not plagiarized or stolen once they are uploaded on your website or platform. This is where Learnyst comes to the rescue with the following security features –
- Password authentication for every student
- Time signed URL to make sure that no-one sees your videos for more than the required time.
- High-end DRM protection to provide immunity from hackers
- Multiple logins tracking to monitor suspicious behavior
And these are just a few of the many features that Learnyst offers. If you want to know more and ready to supercharge your career as an online educator, then click the below button.
You can create your own branded online academy, upload, sell.
So, go ahead. Create and Sell Courses online.
Leave your thought here