
If you want to create slides for an online course, you can do it with powerpoint/ppt.
Powerpoint is one of the most common tools trainers use to make interesting online courses.
With zero design experience & using free software’s you can make amazing online courses.
In this post, I am going to show how to create slides for your online course with the free tool google slides. Here is what we will cover:
If you have a google account, you will automatically have access to this tool.

Once you access your google slides, you can simply follow the steps laid out in this article to create slides for your online course.
Check out the other articles on online course creation
- How to make an online video based course
- Create free video courses using youtube embeds
- How to teach an online course that students want
Write a script for your online course
To create slides for your online course start with a script for the 1st lesson in a word document.
Decide the goal or objective for your lesson and then start writing the script like you are talking to your students in real life.
For easy writing, divide the script into sections you want to cover.
For example,while writing the script, I make imaginary sections like an introduction section, that explains what the lesson is about, then I go about explaining the problem, why it needs to be solved and how it can be solved.
Writing a script like this will give you the solid content required for your presentation. Cover all the points you want to cover in this script.
We will later summarize these points in the PPT.
Choose the templates
Google Slides offer a lot of free templates that give your course, stunning looks.
Just click on google slides and select the template gallery. Watch this GIF here.
Some Google Slide templates have more graphs, others have more images. So, pick the ones that suit you the most.
Create slides for your online course lessons
Below are the key things you need to know while creating the slides for your course.
Change first slide
First, change the first slides name to your lesson name
For ex: For my physics course, I will make it something like this.
Change the Presentation Name
The best way to name your presentation will be to use a combo of section name and lesson name
For ex: I have named my PPT as Unit I, Lesson 2 for easy naming.
Rearrange the slides
Bring the slides you want to be on top. Do you want a graph? Simply drag it and bring it on top. Watch this gif to find out.
Maintain Consistent Font Size
To make your slides appealing, give a consistent font size to the headings and text.
For example within a slide, the heading should have size around 40px and the text should be 20px.
For consistency, your headings should be twice the size of your text. To know how to change the font size, watch this gif.
Experiment with other font families as well. You can try the Montserrat font for heading and Open sans for the text and see if you like it.
Copy and Paste Text from Script
Now go any slide after the introduction slide and paste the script that you want to paste.
If you want your script to look the same as the one in PPT, choose paste without formatting.
Alternatively you can press ctrl+v in your keyboard to paste the script.
Please note that the slide should be a summarized version of your script. So, paste only the important bullet points from your script into the slide.
Create new text with Textbox
You can also click on the textbox option on the top to add a textbox in your slide. You can then customize fonts according to your preference.
Create and use shapes
There are a number of shapes in the google slides.
To reuse an existing shape click on it and press ctrl+c and paste it with ctrl+v.
Now move it around and change the colors and area of the shape.
Change Images
Change images by double clicking the image file. Click the upload from computer option to upload any images.
Change Background
You can change the background color of your slides by right clicking the slide and selecting an appropriate color
Change Layout
If you don’t like the style of the slides, right click on the slides and edit layouts and change it.
Build Transitions or Animations
You can create transitions like a dissolve or fade to make your slides engaging. Here is how you can do this.
Right click on a slide and select transition. Select an appropriate transition and apply it to all the slides.
Copy slides for your online course
If you want to duplicate the changes to a new slide, simply copy and paste this PPT.
Export slides for your online course
In the last step simply download the PPT in your system in any of these formats.
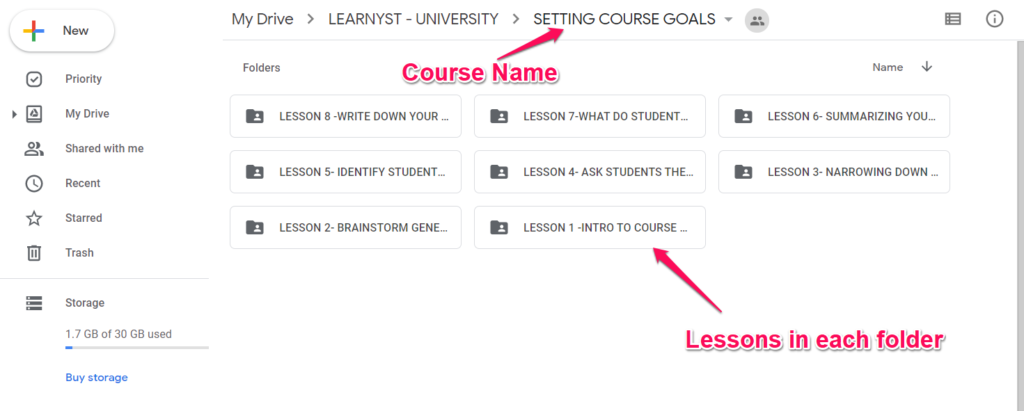
Please save this file in the folder structure that resembles your course for easy usage.
With this blog, I hope you now have an idea of how to create an online course slide.
so go ahead and create an online course with ppt and upload it in your online academy.
If you want to know how to create a course structure check the how to create an online course goal & structure.
To know more about building courses check our build a course archive
If you have not created your online academy yet, click the button below.
Leave your thought here