Make a Quiz on Learnyst
- December 1 2015
- Ranjan
If starting your own elearning school takes a challenge so does the management of the assessments of students who enroll to your courses and tests. Even when you have the best content, you end up spending nights together managing your student’s assessments. Making a quiz on Learnyst is the best solution to come out of this hurdle.
How to Create a Quiz on Learnyst
Thanks to Learnyst Quiz Maker, you can spend all that time in gaining and sharing more knowledge. Learnyst gives you the best and simplest way to make a quiz and manage your student assessments in a few clicks. All you have to do is, follow these instructions and have your quizzes ready.
Step 1 : Login as your school admin and click on UPLOAD YOUR COURSE (Step 2 in the image below). In case you have not registered on Learnyst you can sign up for free at http://learnyst.com/signup
Step 2: Go to Test tab in course page and click on Create.
Step 3: You can enter the desirable Test name and set the price for that course or set it as a free one and Encrypt the course to assure that your test is secured. Once you decide on the type of course, enter the details and click on create.
Step 4: When you click on Create you will enter the quiz maker page. Click or drag and drop a section to add section to your quiz. Click Settings to change the settings of your quiz or Back to go back to previous page and add few more quizzes. You can make a quiz with multiple choice questions or add Numerical Questions.
 Step 5 : Click on Multiple Choice button on the left panel or drag and drop to add multiple choice questions to your sections.
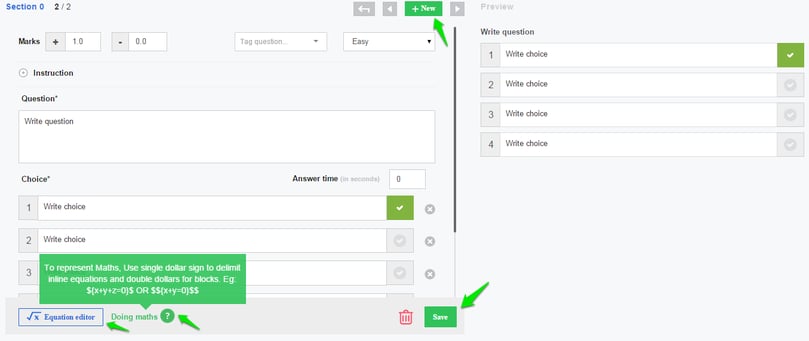
Step 6 : Question builder page is where you make a quiz with multiple choice questions. If you are framing maths questions you have like Equation editor. Click on Save. Click +New to create new questions.
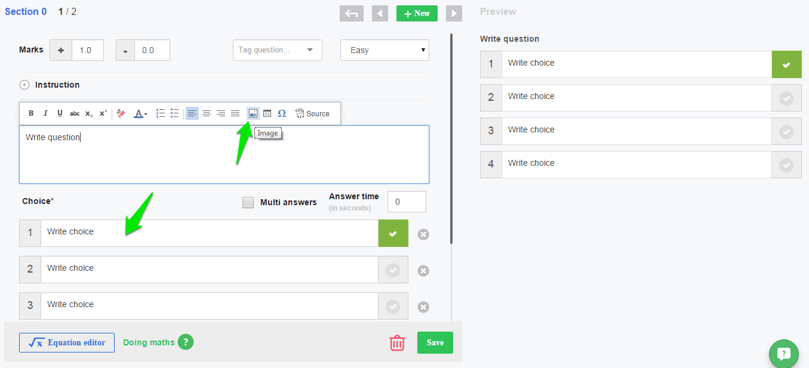
Step 7 : You can add images in the questions you frame and multiple choice options as well. In question editor click on image icon as shown in image below.
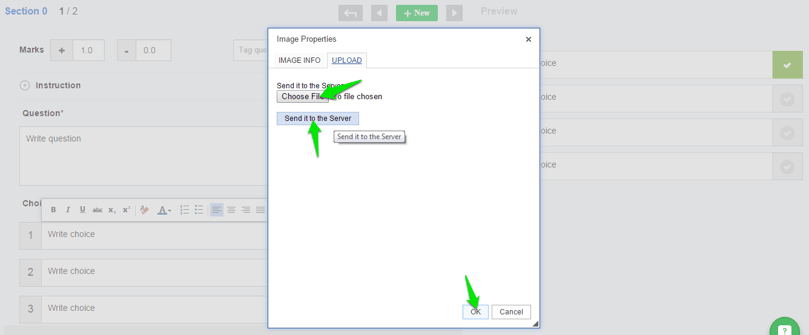
Step 8 : Choose a file and click on send it to the server and click on Ok.
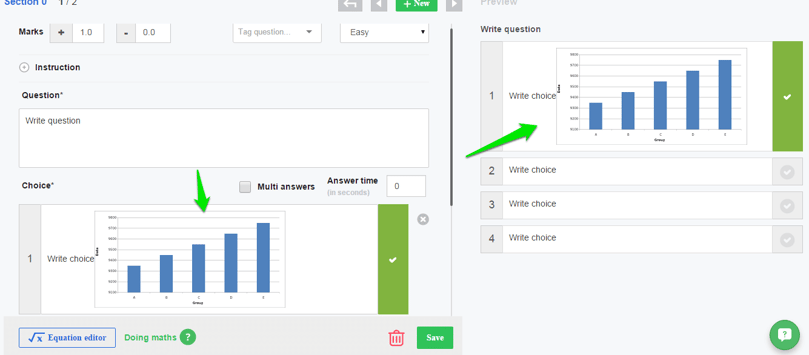
Step 9 : Your image gets added to the question. Similarly you can also add images to the multiple choices.
Step 8 : To add numerical question to your quiz. Click on Numerical button to add to the section.
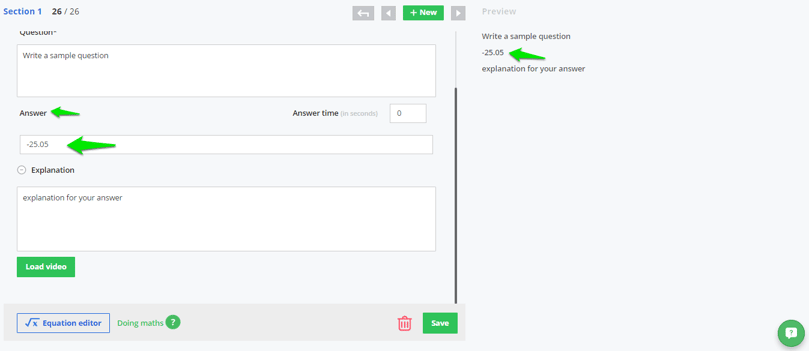
On clicking numerical question type, in your question builder you can see the answer text field to enter direct answers. Note: Answers should be in real number. ex: 25.25, -25.05
You Can Make a Quiz with below featured settings:
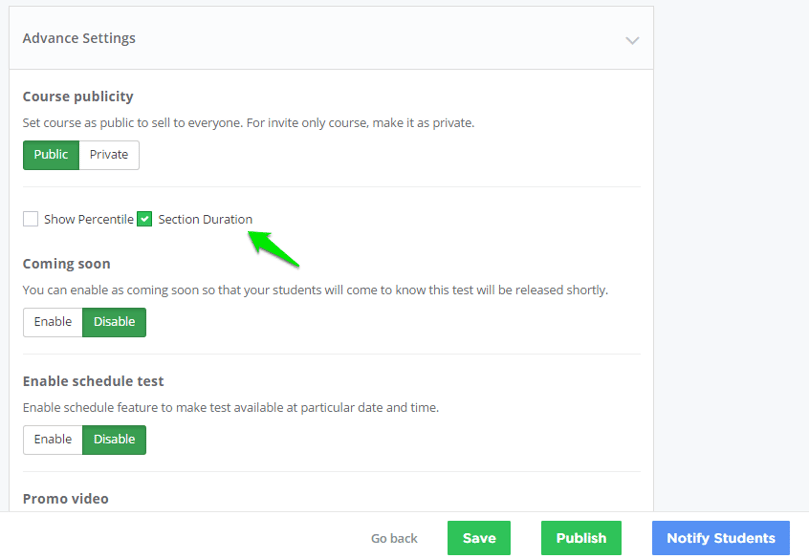
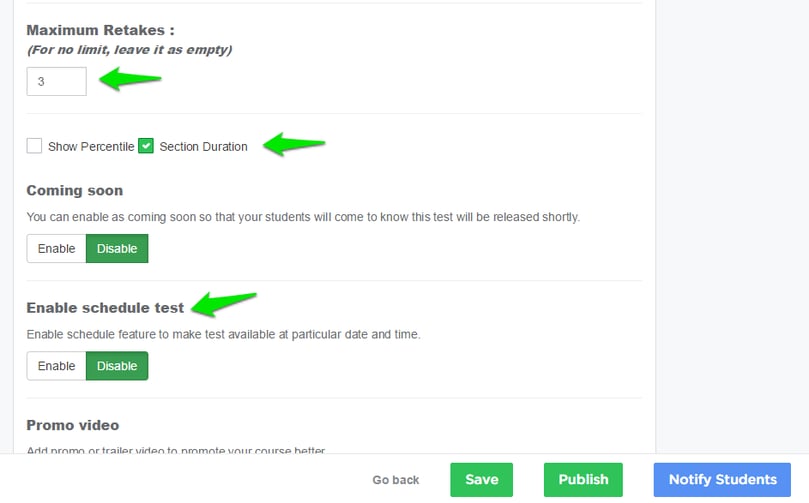
Test Duration: You can also set the time duration for each section of your quiz. Go to Course builder –> Settings –> Advanced Settings in Quiz Maker and select the check box for Section duration
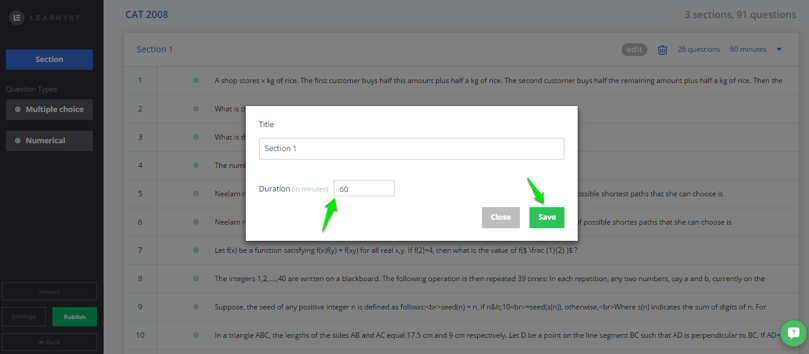
Once you are done go to course –> section –> edit. Enter the duration of section. ex: 60 seconds and click on save. So when the student has completed the section duration, quiz moves to next section.
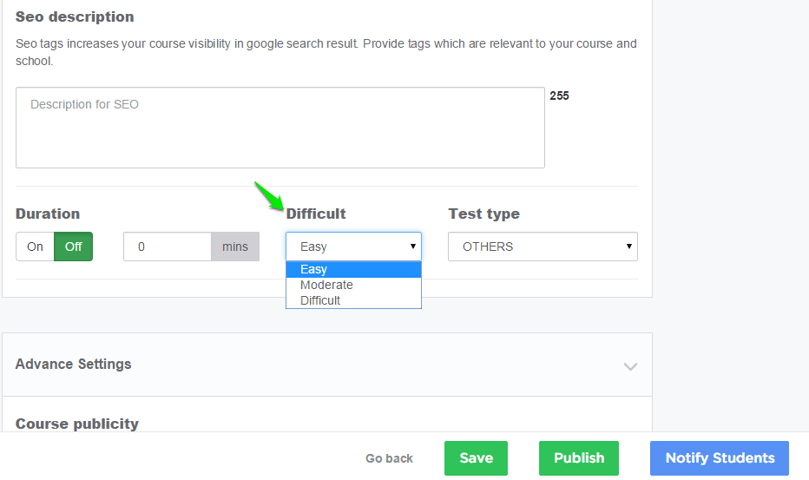
Difficulty Levels: You can set the difficulty level like easy, moderate and Difficult.
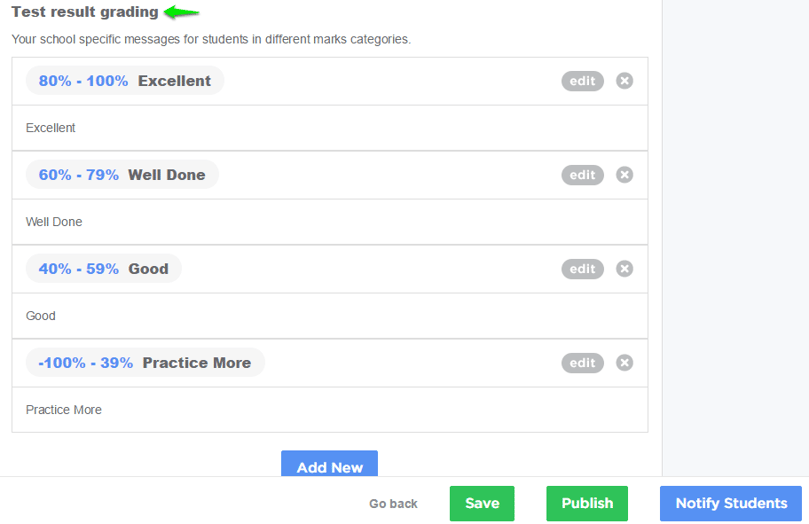
Grading: You can appreciate and motivate the student’s performance with grading system.
Restrict the number of retakes a student can take for a quiz. Click on Enable schedule to make a quiz available at particular date and time and click on Update.
Click on Publish to make it visible to all your students or unpublish to hide. You can enable as coming soon so that your students will come to know this test will be released shortly by clicking on Enable/disable. Delete your test, all questions, student test information will be deleted. Click on Update to save your changes.
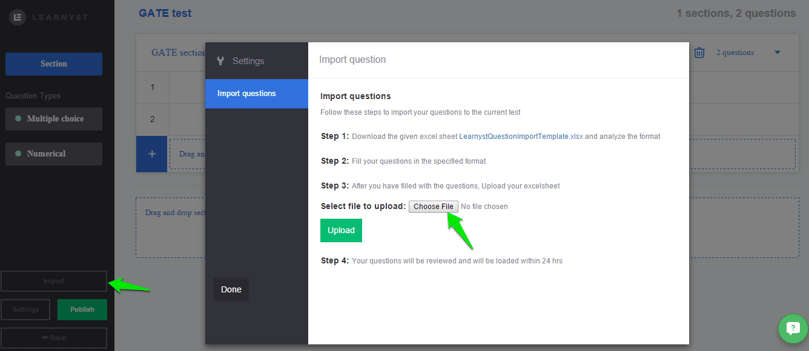
Click on Import Questions to import questions from your archive.
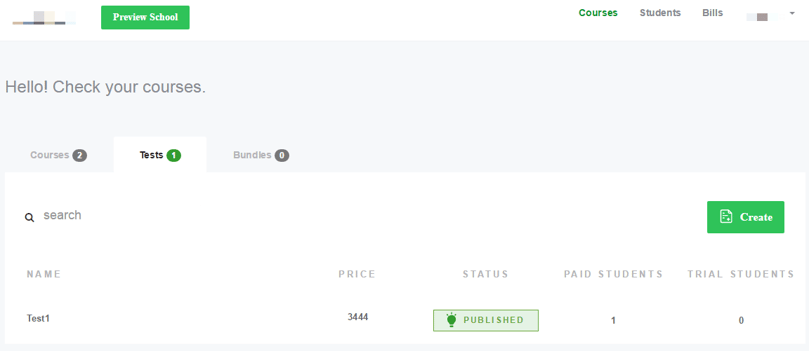
Once you are done with creating test and done with adding the questions click on Publish!


Leave your thought here