

Can you imagine When you wake up one morning, you discover that everything you learned in school, college, or from textbooks would still be retained and useful to you years later if it had been presented to you in the form of brief, well-produced videos rather than lengthy lectures. Because a training video spoke to you clearly, in your language, and at your own pace, you are able to recall nearly every detail, including how to code a function, weld, or fix a bug, without the need for notes.
Perhaps this hasn't occurred yet. After sitting through hours of intense sessions, you may have asked yourself, "What exactly stuck?" Or perhaps you tried watching a video to learn something, but you skipped parts because your thoughts were racing or the video was too long.
This is where effective training videos come in, not only to impart knowledge but also to change the way students interact, retain, and use what they have learned. They help close the gap between what is known and what is done. We now know how to create videos that not only "look good," but also function well for engagement, retention, and long-term impact because of recent research.
Why Use Training Videos? (Benefits & Use Cases)
It's important to comprehend why training videos are so effective before getting into the how. This helps set the purpose and direction.
Benefits:
- Higher engagement & retention: Compared to text alone, visual and auditory content aid in understanding and memory retention.
- Scalable & reusable: Once produced, a single video can benefit numerous students, cutting down on tedious tasks.
- Consistency: There is no variation in the instruction given to each learner by different trainers.
- Flexible access: The ability to pause, rewind, and rewatch allows learners to learn at their own pace.
- Better brand / institutional value: Professionalism is enhanced by well-written training materials.
Use Cases:
- Onboarding and training of employees
- Walkthroughs of products and customer education
- MOOCs, tutorials, and eLearning courses
- Documentation of internal processes
- Certifications and training in compliance
Choices (duration, style, delivery platform, assessment, etc.) will be influenced by your purpose.
Steps to Create Training Videos
Pre-Production: Planning & Strategy
A large portion of the project's success is determined at this stage. A well-planned strategy reduces frustration, time, and rework.
Define Objectives & Audience
- SMART learning objectives: After watching, what should students be able to do? For instance, "Install and configure X software module."
- Audience profiling: Who are your students? What is their level of prior knowledge, preferred method of learning, level of technical comfort, and usage context (desktop or mobile)?
- Scope & depth: Choose your level of granularity. Avoid overflowing with irrelevant material.
Choose Video Format / Style
Some common formats:
- Screencast + voiceover (good for software tutorials)
- Talking head + slides
- Animated / motion graphics
- Whiteboard / sketching (digital or physical)
- On-camera demonstration (for physical products / processes)
- Hybrid / mixed media
Select a format that fits both your budget and your target audience.
Outline Modules / Structure
Divide your training into manageable chunks, usually lasting five to fifteen minutes each. Every module ought to concentrate on a distinct task or subtopic. To serve as your skeleton, create a high-level structure (module titles, flow).
Resource & Timeline Planning
- Determine the following: screen capture software, voiceover talent, visual assets, script, and editing time.
- Make a schedule with important checkpoints (script ready, shoot, edit, review, publish).
- Assign duties (if more than one person is involved).
Scripting & Storyboarding
The storyboard and script serve as your video's blueprint.
Writing the Script
- Write in plain, conversational language.
- Address the student using "you."
- Keep your sentences brief and steer clear of jargon (or define terms).
- To make navigation easier, use signposts and transitions ("In this section," "Next, we'll see," etc.).
- Indicate where you plan to add screen grabs, callouts, or images.
- Make space for emphasis, pauses, and replays.
Storyboarding
- Draw or arrange important visual frames next to script lines.
- If a slide, screenshot, animation, or on-camera shot is needed, make a note.
- This eliminates guesswork during recording and editing.
Include Assessment / Checkpoints
To strengthen learning, include brief tests, reflection questions, or mini-assignments in between modules if you'd like.
Equipment & Setup
Hollywood equipment is not necessary to get started, but mastering the fundamentals raises the perceived caliber.
Basics You’ll Need
- Camera / Webcam: a good smartphone or even a decent HD (1080p) camera.
- Microphone: For crystal-clear audio, an external microphone (USB or XLR) is highly advised (much more important than fancy visuals).
- Lighting: To prevent harsh shadows, use soft, even lighting (such as a ring light or softbox).
- Tripod / stand: for steady-state shots.
- Screen capture software: such as Camtasia, ScreenFlow, OBS Studio, etc.
- Editing software: DaVinci Resolve, Premiere Pro, Final Cut, or more basic programs like Camtasia and Filmora.
- Graphics / asset tools: for animations, callouts, and slides (e.g. Canva, Illustrator).
Setting Up the Space
- Select a space that is calm and echo-free (dampen sound with pillows and curtains).
- Make sure the background is clean, simple, or branded (green screen if at all possible).
- Make use of appropriate lighting, preferably three-point (key, fill, and backlight) lighting.
- Make sure to leave headroom and follow the rule of thirds when positioning your talking head.
- Test the audio and video by recording a brief clip and examining the lighting, volume, and clarity.
Recording Best Practices
You want as few mistakes as possible when you press "record." Here are some pointers:
Prepare & Warm Up
- To get your pace, flow, and any difficult transitions down, do a couple of "dry runs."
- Enunciate your words clearly and a little louder than usual.
- To cut down on plosives (p, b sounds), use a pop filter on your microphone.
Recording Screen / Demonstrations
- Hide UI elements that aren't needed (notifications, toolbars in the browser).
- To make it visible, use a high contrast cursor or a simple theme.
- To direct attention, highlight or zoom in on specific areas of the screen.
- Make use of pan effects, zoom-ins, and seamless transitions.
Recording Voiceover / On-camera
- Keep your speech rate and tone constant.
- To make it easier for the editor to cut, pause a little at the end of sentences.
- It's easier to edit if you pause and say the sentence again after making a mistake.
- Employ redundancy or auto-backup by recording audio independently or creating backup files.
Recording Tips for Multiple Takes
- Give takes clear labels, such as "intro_take2."
- Maintain constant lighting and sound levels.
- If mixing takes place, avoid breaks in continuity (clothing, background changes, etc.).
.png?width=870&height=489&name=Twitter%20post%20(76).png)
Editing & Post-Production
Here, the raw materials are refined to create the finished product.
Assemble the Rough Cut (Timeline)
- Set up your main video track, which includes voiceover, screen capture, and camera.
- Eliminate filler words, lengthy pauses, and errors.
- Add visual components (lower thirds, callouts, screenshots, and slides).
- Make thoughtful and limited use of transitions (fade, cut, slide).
Audio Mixing & Enhancement
- Adjust the audio levels so that each segment is the same.
- Use noise reduction tools or filters to eliminate background noise.
- If appropriate, use sound effects or ambient music, but make sure they don't overpower or distract the speaker.
- To make your voice clear, use EQ and compression sparingly.
Add Captions / Subtitles / Transcripts
- Make sure your captions are accurate; auto captions can be useful, but always make corrections.
- Add subtitles or make transcripts available for download.
- Because text can be crawled, captions aid in both accessibility and SEO.
Insert Graphics, Animations & Branding
- Make use of lower thirds, branded intros and outros, and logo watermarks.
- Include pointers, emphasis shapes, and animated callouts.
- Make sure all modules use the same fonts, colors, and styles.
Add Timestamps / Chapters
- Divide the lengthy video into chapters and include timestamps.
- This facilitates navigation for viewers, and search engines might extract those into snippets. (Boston University)
Final Review & Quality Check
- Check for bugs, sync problems, or residual errors while watching the entire video at 100% speed.
- Verify the audio-visual synchronization.
- Make sure every image is readable and long enough to read.
- Export in the proper formats (e.g., MP4 H.264, 1080p or higher, with a respectable bitrate).
Publishing & Hosting
Usability, SEO, and reach all depend on where and how you host and distribute.
Choose Hosting Platform(s)
Options include:
- Vimeo and YouTube (excellent for streaming, embedding, and visibility)
- Self-hosted or on your LMS or website
- Platforms for online learning (such as Learnyst)
- Internal networks and enterprise video portals
- You frequently incorporate a Vimeo or YouTube video into your website to increase SEO and reach. (Google For Developers)
Embed In Relevant Web Pages
- Build a landing page or blog around your video and include it next to informative text. (Google for Developers)
- Include links, internal links, transcripts, and context around it.
- To help search engines comprehend the video, use structured data and video schema.(RankMath)
- Offer choices for download (if applicable), playback speed, and full-screen.
Optimize Metadata (Title, Description, Tags)
- Your target keyword should appear close to the start of the video title. (Boston University)
- Make use of detailed, keyword-rich descriptions; the first one or two sentences are especially important.
- Make careful use of hashtags and tags (YouTube tags, category).
- Include CTAs in the description along with pertinent links (course pages, related modules).
Thumbnails & Preview Images
- Create unique, striking thumbnails with contrast and readable text that are 1280 x 720 pixels with a 16:9 aspect ratio. (CommunicationGuide)
- Avert clickbait by making sure the thumbnail appropriately depicts the video content. (CommunicationGuide)
Use Cards, End Screens & Playlists (for YouTube)
- In the middle of a video, use cards to connect to other modules or pertinent videos.
- To advertise the upcoming video, subscription, or playlist, use end screens.
- To promote session watch time, group videos into playlists.
Video SEO & Discoverability
SEO is crucial if you want people to find your training videos.
What Is Video SEO?
It is the process of making your videos (and the pages that host them) as search engine-friendly as possible so that search engines like Google and YouTube can index, rank, and show them to the appropriate audience.
Keyword Research
- To find pertinent search terms for training videos, use Google Keyword Planner, YouTube's search autosuggest, related videos, and tools like Ahrefs and SEMrush.
- Pay attention to keywords like "how to," "tutorial," and "step by step."
- Map the main and a few secondary keywords for each video.
On-Video / File Optimization
- Give the video file a descriptive name, such as "how-to-use-productX.mp4"
- For embedded video thumbnails, use alt text or captions.
- Make use of captions and transcripts, which give search engines text.
- To enable search engines to parse the metadata, include structured data (VideoObject schema) in the page source.
Engagement Signals & Watch Time
YouTube and search engines strongly prefer videos that:
- Hold viewers for an extended period of time.
- Are active (likes, comments, shares)
- Encourage viewers to stay longer by providing playlists and related content.
- Are content observed until they are finished (or almost finished).
The viewer must therefore be delighted and satisfied by your content.
Embedding & Sharing Strategies
- To improve internal linking and dwell time, include videos on several pages or in related articles with pertinent text.
- Post on forums, communities, and social media to increase backlinks and early engagement.
- To help Google find your videos, think about creating a video sitemap for your website.
Measuring Success (Analytics & Iteration)
Your work doesn't end with publication; you still need to keep an eye on things, evaluate them, and make improvements.
Key Metrics to Track
- Views / Impressions
- Watch time / Average view duration
- Retention / Drop-off points
- Engagement (likes, comments, shares)
- Click-through rate (CTR) on thumbnails
- Conversion or Learning outcomes (did users complete module, quiz, next video?)
- SEO ranking / Traffic from search
Tools You Can Use
- YouTube Analytics / Studio
- Google Analytics / Google Search Console (if embedded on site)
- Heatmaps / user recordings (if learners watch videos on site)
- LMS / eLearning platform analytics
Iteration & Improvement
- Utilize drop-off points to identify areas where viewers become disinterested and adjust the pacing or content.
- Try different titles, thumbnails, or segments.
- To keep it current, update the content or metadata over time, particularly for evergreen training.
- Get input from students and put their recommendations into practice.
Tips, Tools & Common Mistakes
Pro Tips
- Modules should be brief (5–15 minutes) because after that, people's attention spans wane.
- Always state the main points of the discussion and introduce the topic.
- Make use of consistent branding elements (colors, fonts, and tone).
- Make use of transition cues or "bridge" slides ("Now we'll...").
- Make use of call-to-actions, such as "Download worksheet" and "Try this now."
- Offer resources that can be downloaded, such as quizzes, slides, and checklists.
- Always make a backup of your project and raw files.
- If necessary, localize or translate for viewers (add captions in other languages).
Recommended Tools (free / paid)
|
Function |
Tool Suggestions |
|
Screen capture / recording |
OBS Studio, Camtasia, ScreenFlow |
|
Video editing |
DaVinci Resolve, Premiere Pro, Final Cut, Filmora |
|
Audio cleanup |
Audacity, Adobe Audition, iZotope RX |
|
Graphics & animations |
Canva, Illustrator, After Effects |
|
Captioning / transcription |
Otter.ai, Rev, Subtitle Edit |
|
Hosting / LMS |
YouTube, Vimeo and Learnyst |
Common Mistakes to Avoid
- Inadequate audio quality (even subpar images with poor sound become less credible)
- Extended uninterrupted recordings devoid of organization
- failing to remove filler words ("um," "uh")
- Lack of transcripts or captions detracts from SEO and accessibility.
- Titles and metadata are not optimized for discoverability.
- Deceptive Clickbait thumbnails erode credibility
- Ignoring feedback and analytics (never getting better)
Create, Host, and Sell Your Training Videos with Learnyst
The next step after mastering the art of producing powerful training videos is to make them come to life for your viewers, and Learnyst is the perfect tool for that.
With Learnyst, you can create your own branded learning platform where your training videos are easily protected, promoted, and made money.
Learnyst is unique for training video creators for the following reasons:
1. Secure Video Hosting with DRM Protection
Use dynamic watermarking and DRM (Digital Rights Management) to safeguard your laborious work against downloads or piracy. Your intellectual property is protected, so every video you upload is authentically yours.
2. Easy Course Builder
Without writing a single line of code, you can add quizzes or PDFs, arrange lessons, and upload your videos. With Learnyst's drag-and-drop builder, you can quickly create professional, well-structured courses.
3. Deep Analytics for Better Training Insights
To keep improving your content and teaching methods, monitor how students interact with your videos. You can see completion rates, engagement duration, and quiz results.
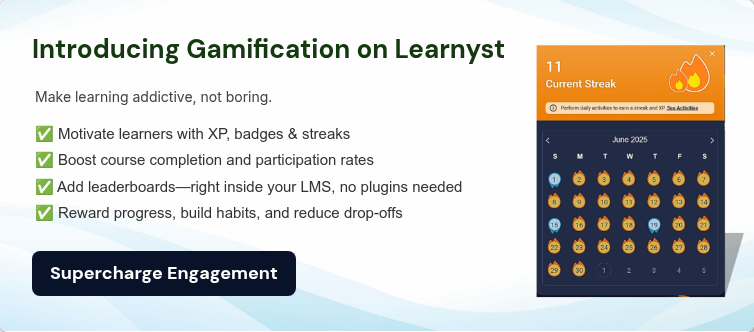
4. Learner Engagement Tools
Create a social learning environment with discussion boards, communities, and leaderboards to keep your students engaged and inspired.
5. Monetization and Marketing Tools
Learnyst gives you total control over pricing for both one-time purchases and subscriptions. Additionally, you can expand your reach more quickly by allowing others to promote your training videos through integrated affiliate programs.
Conclusion: Build Beyond Just a Training Video
Making instructional videos is only the first step. The true magic occurs when your students can easily access, interact with, and develop from your videos and Learnyst gives you that advantage.
Students today do more than simply observe; they engage, evaluate, and demand customization. Learnyst gives you the ability to easily meet those expectations. As an educator, business owner, or corporate trainer, the platform assists you in:
- Build a branded online academy that reflects your identity and vision.
- Use adaptive streaming to provide fluid, high-quality video experiences that adapt to each learner's internet speed.
- Make learning journeys, not just videos, with discussion areas, certificates, and tests to encourage participation.
- Use comprehensive analytics dashboards to monitor learner performance and gain practical insights into what is and is not working.
- Utilize integrated marketing, affiliate management, and lead tracking tools to turn your content into a business and automate growth.
Therefore, Learnyst helps you own your content, your learners, and your success rather than just posting your training videos on platforms where you have no control over your audience or data.
Your videos are worthy of more than just views; they should be part of an ecosystem that improves student learning and increases your revenue. Begin your journey with Learnyst right now, where your passion becomes a successful learning brand and your knowledge meets technology.
FAQs
1. What is the best software to create training videos?
For editing and screen recording, Learnyst, Camtasia, OBS Studio, Loom, and Adobe Premiere Pro are popular programs.
2. Do I need expensive equipment to make training videos?
Not at all. Beginners can achieve excellent results with a good smartphone camera, a clip-on microphone, and the right lighting.
3. How can I make my videos more engaging?
To keep viewers engaged and motivated, use interactive tests, stories, images, and on-screen text.
4. What’s the best format for training videos?
Use MP4 (H.264 codec), which is perfect for streaming on all devices because it strikes a balance between high quality and small file size.
Comments