Build a course
How to create high value courses?
Want to know how to create high value courses? This post gives you a step by step guide on building a high value course in no time.
This article provides you step by step guideline to create a quiz for your course on your Learnyst online school.
This article provides you step by step guideline to create a quiz for your course on your Learnyst online school. We recommend using Chrome browser for performing admin activities of your online school.
After successful signup on Learnyst, you will see a welcome screen with 3 step process outlined to configure your online school. You will also see this screen when you log in as your school’s administrator.
1. Click on the Green ‘Upload Course’ tile to get started
Note: Depending on your school’s configuration stage you might not see upload course button, In such case you can click on UPLOAD section above this button

2. Upon clicking Upload Course, you will be taken to course list page where you can see a list of courses created for your online school. Click on ‘Create Course’ to create a new course.

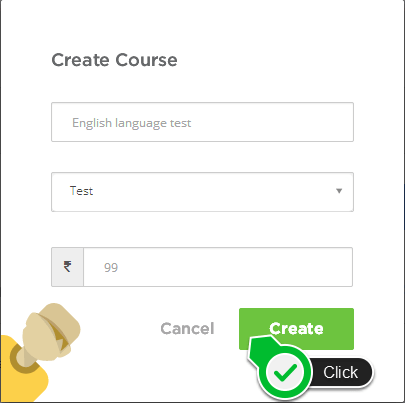
3. Fill in course name, course type – Choose ‘Test’ for creating quiz course, course price – enter the price that you would like to fix for this quiz course. You can choose the currency type later from settings. After entering all the details click on ‘Create’ button.
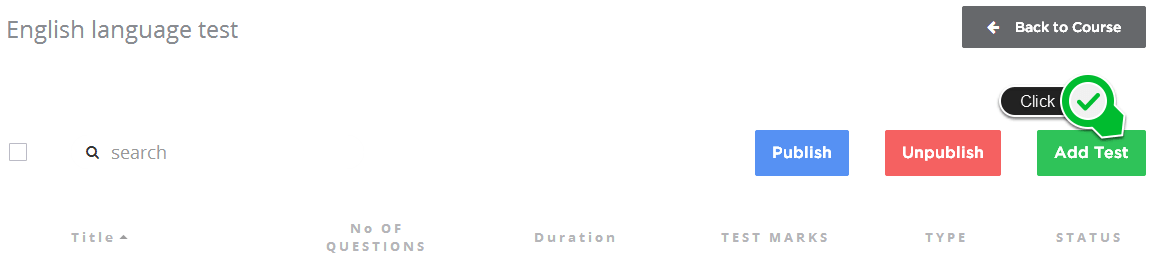
4. Upon clicking ‘Create’, you will see quiz list interface where you can view all your quiz courses and perform actions like publish, unpublish and create new quiz course. Click on ‘Add Test’ to create new quiz course.
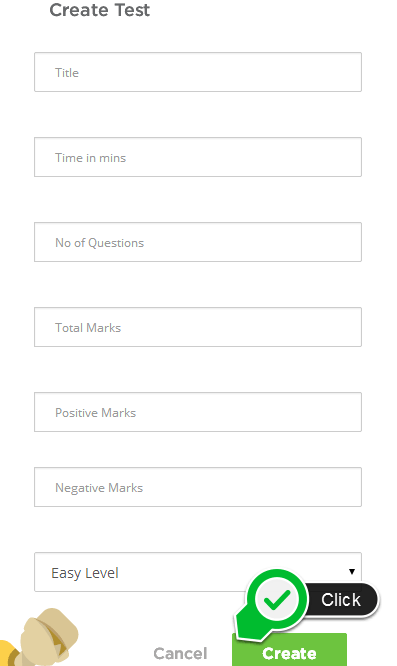
5. Enter details about the quiz test that you are about to create. After filling all the details click on ‘Create’ button at the bottom of the dialog window.
6. Upon clicking Create Test you will see test builder interface where you can organize your quiz by adding sections and questions to create a quiz. To begin with, click on ‘Add Section’ on the left action bar and enter section name in the text area on the right pane. Click outside the text area or click ‘Enter’ to confirm section name. After creating a section click on ‘Multiple Choice’ on the left action bar.

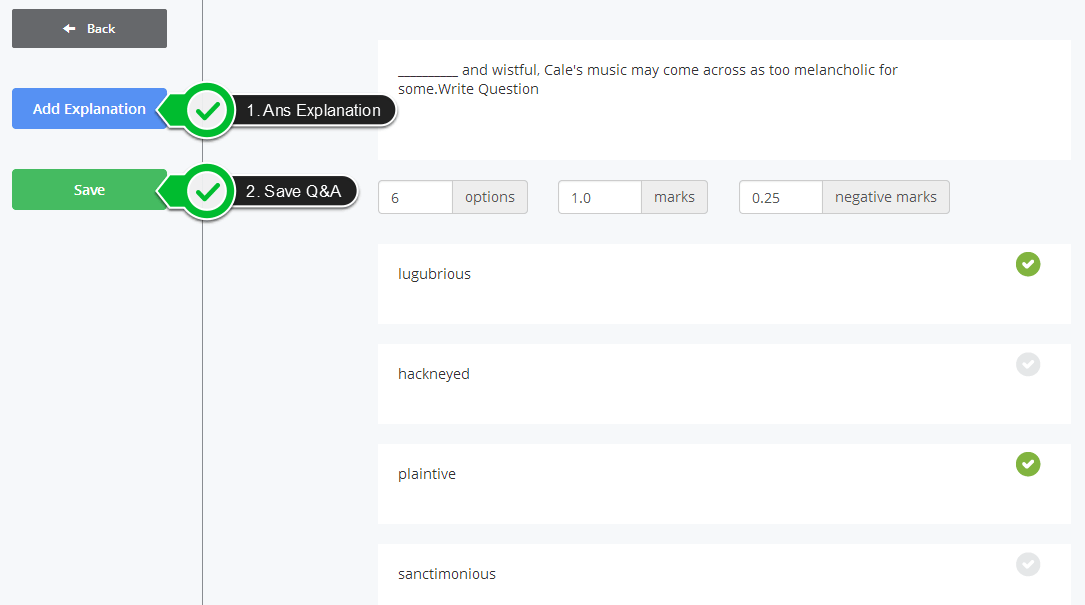
7. In Multiple Choice Q&A interface you can add multiple choice questions. Our interface provides flexibility for each question where you can choose a number of options, positive marks, negative marks and choose more than one option as correct answers. When you are done with entering questions, options and correct answers you can choose to add answer explanation or save the question. Adding answer explanation is optional and students can view them only after submitting their test. Upon clicking on ‘Add Explanation’ button, explanation text box appears on right pane bottom. Please scroll down on the right pane.
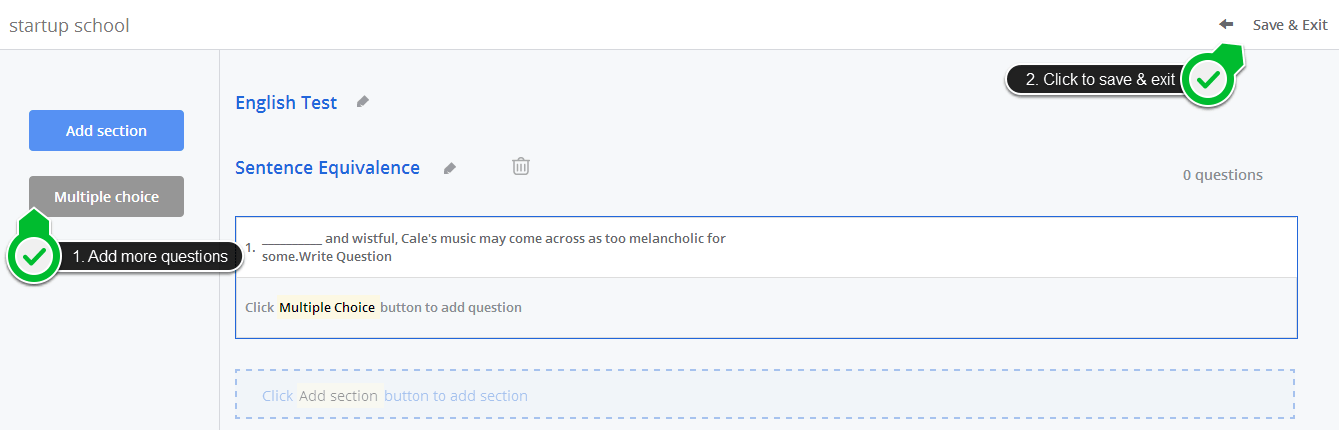
8. When you are done entering and saving a question you can repeat the process by adding more multiple choice questions by clicking on ‘Multiple choice’ option on the left action bar. When you are done with entering all questions click on ‘Save & Exit’ on right-hand top corner of quiz interface.
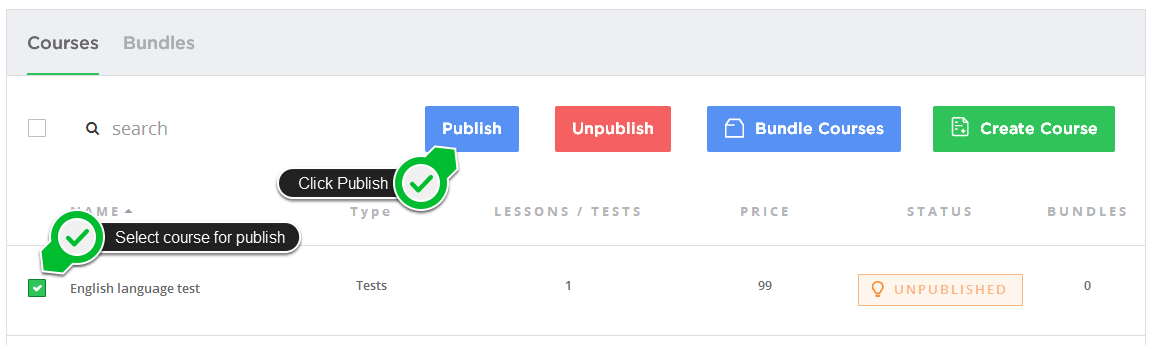
9. To make your quiz available to your students, choose the quiz and click on ‘publish’ button in quiz list view screen.
Want to know how to create high value courses? This post gives you a step by step guide on building a high value course in no time.
How to create and sell eBooks as courses, what are the benefits for using ebooks in your courses content. 6 steps to create ebook...
In this blog post, I will help you create a Facebook page for your online academy from scratch. These steps will help even if you are an absolute...