This article provides you step by step guideline to create online courses by uploading your video / PDF files to your lessons. We recommend using Chrome browser for performing admin activities of your online school.
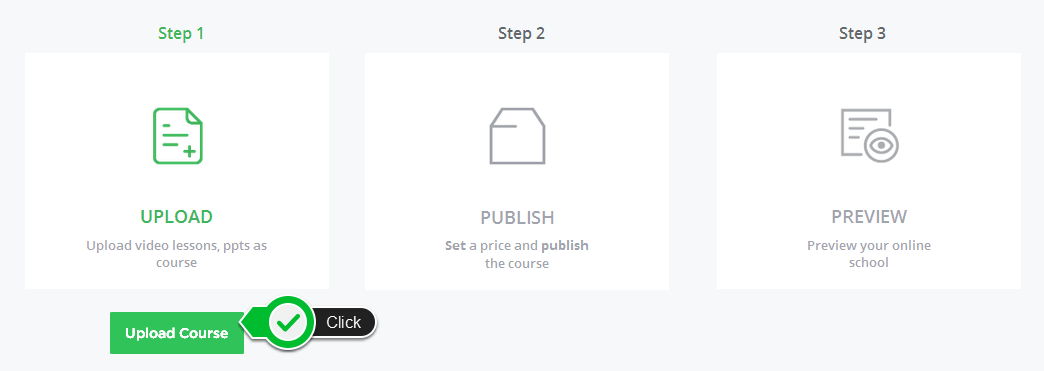
After successful signup on Learnyst you will see Welcome screen with 3 step process outlined to configure your online school. You will also see this screen when you log-in as your school’s administrator.
Upload file to create Online Courses.
1. Click on the Green ‘Upload Course’ tile to get started.
Note: Depending on your school configuration stage you might not see upload course button, In such case you can click on UPLOAD section above this button
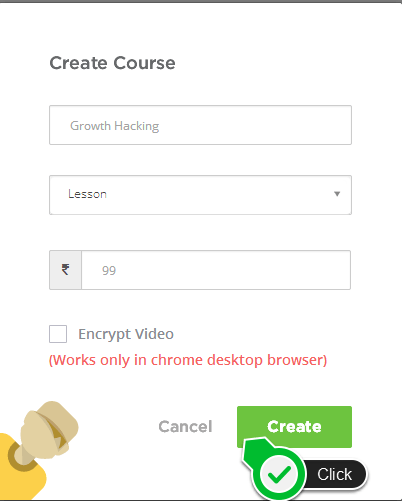
2. Upon clicking upload course, you will be taken to course list page where you can see the list of courses created for your online school. Click on ‘Create Course’ to create online courses.

3. Fill in course name, course type – choose ‘Lesson’ for creating video / PDF lessons; Choose ‘Test’ for creating assessments, course price – enter the price that you would like to fix for this course. You can choose the currency type later from settings, You can choose to encrypt your course by ticking the ‘Encrypt Video’ check box. After entering all the details click on ‘Create’ button.
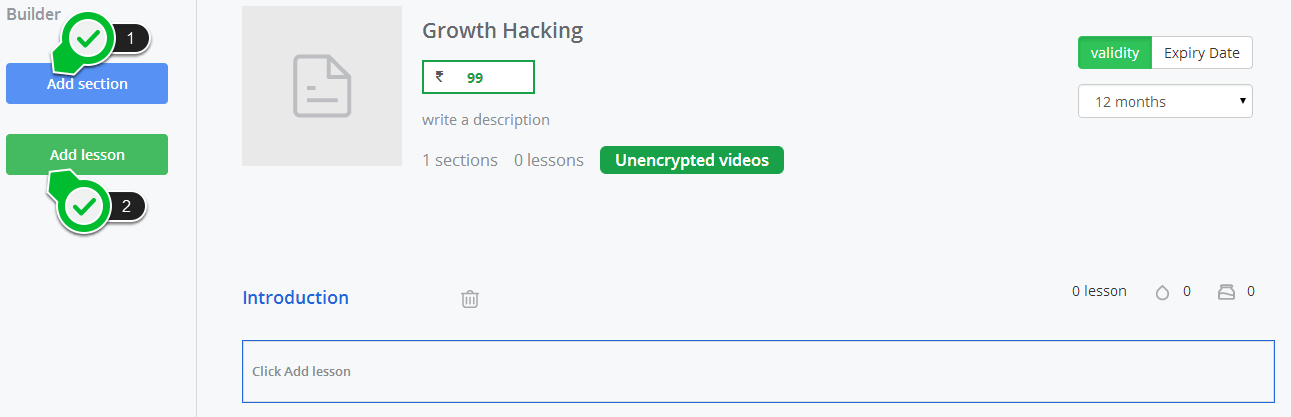
4. Upon clicking Create Course, you will see course builder interface where you can organize your course by adding sections and lessons. In this view, you can also add course image and provide the description about your course. To upload video lessons or PDFs click on ‘Add Section’ on the left action bar and enter section name in the text area on the right pane. After creating a section click on ‘Add lesson’ on the left action bar.
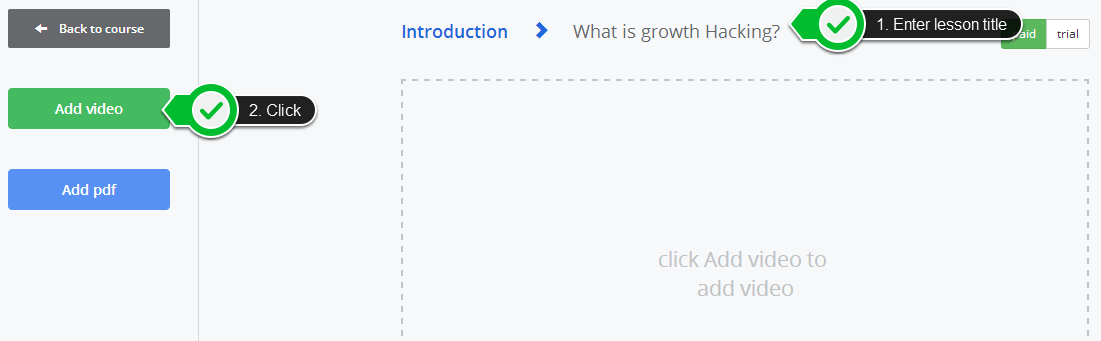
5. In lesson upload interface you can upload video / PDF content related to the lesson. To begin with, enter lesson title on the top right pane. Click on ‘Add video’ to upload or embed video lesson.
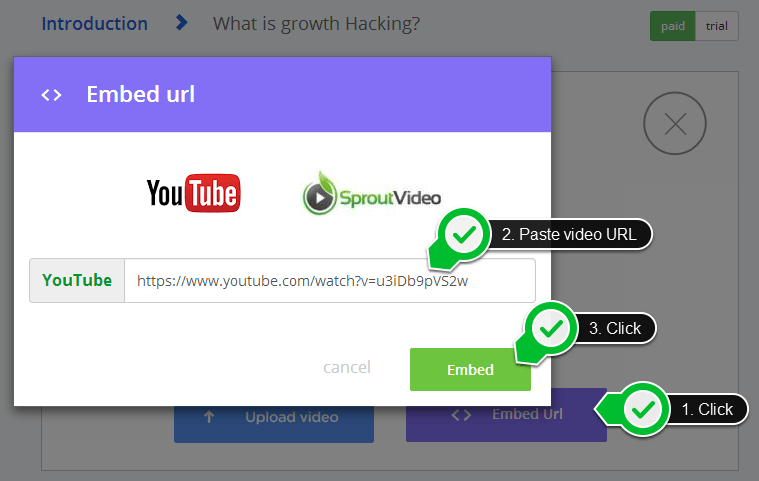
6. You can either upload videos from your system or embed from YouTube or Sprout Video. To embed video click on ‘Embed URL’ button. In Embed URL dialog, choose your video hosting service and provide video URL which you prefer to have for this lesson. Click on ‘Embed’. Upon successful video Embed/Upload, you will be taken back to lesson upload interface.
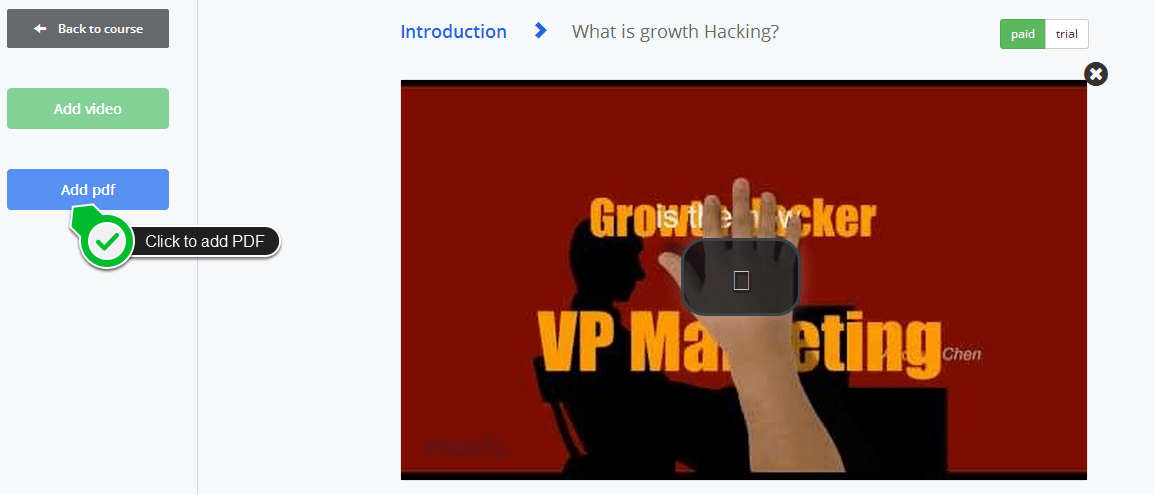
7. To add PDF content with lesson click on ‘Add PDF’ button on left action bar. Again click on ‘Add pdf’ button on right pane which opens up your system file browser. Choose the PDF file that you would like to associate with this lesson.
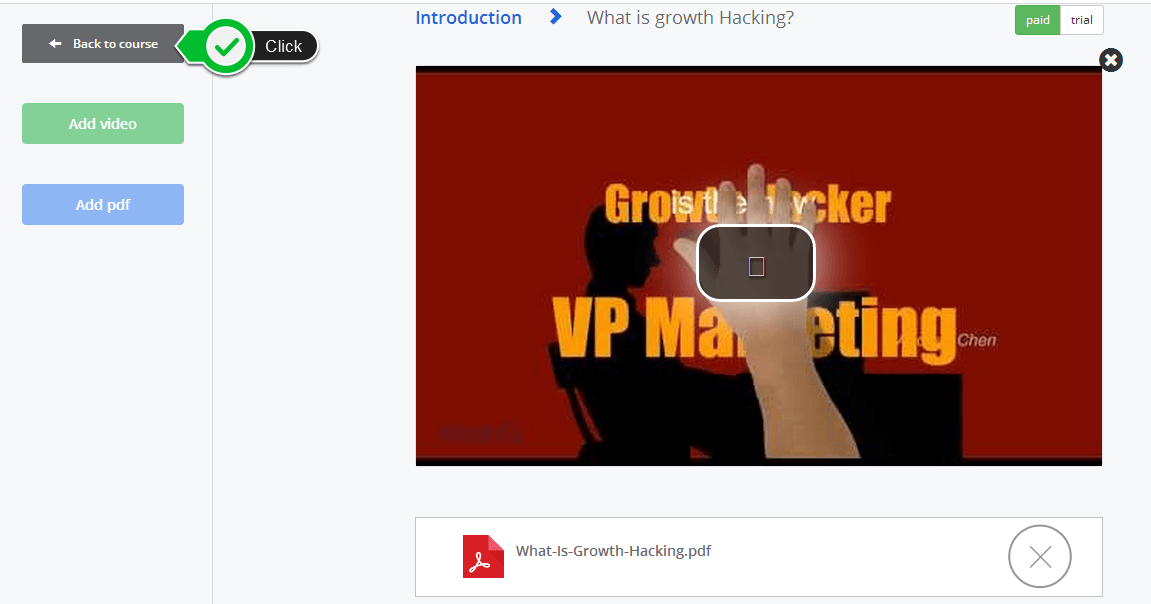
8. Upon successfully adding video content and PDF file for your lesson your lesson upload interface would sometimes look similar to this. click on ‘Back to course’ button on the left action bar.
9. In course builder, you will see sections and lessons successfully added on the right pane. To add more lessons or sections repeat the process by choosing between action buttons on left action bar.
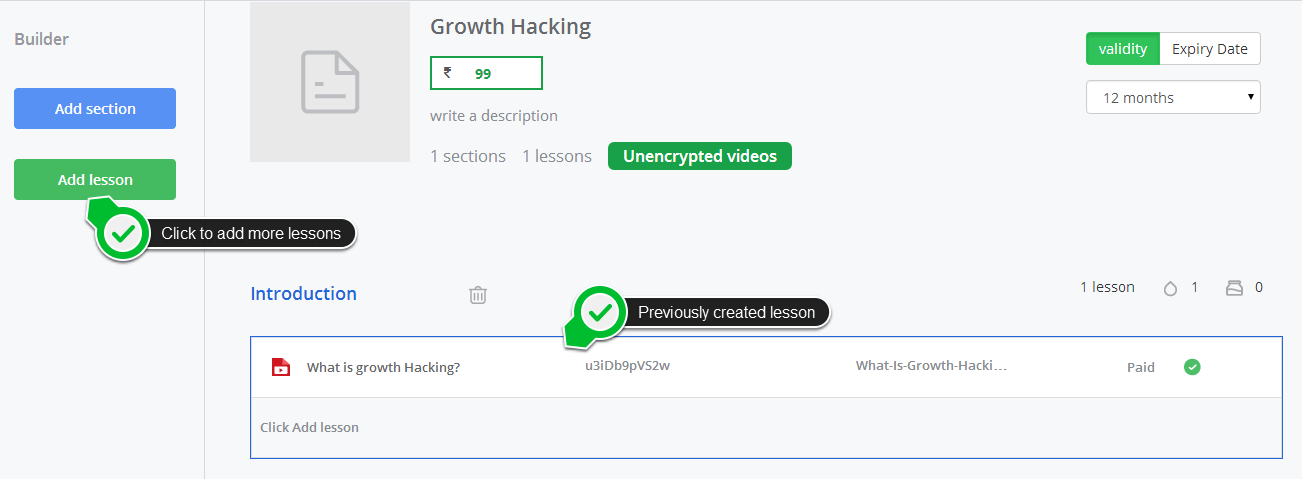
10. When you are done with adding lessons and sections for your course click on ‘Save & Exit’ button on top right while in course builder interface.
Leave your thought here