I am a Graphics Designer @ Learnyst.com and part of my job is to make online teaching portals created on Learnyst look beautiful. The most common question we get is
What is the best tools to create beautiful course image?
Course image helps you to showcase your course in your web page thus it grabs attention of your students easily and it helps to provide brief information about the lesson. It helps you to increase the sales of the course.
After researching many tools, my answer is canva.com.
But, if you want a tool that has all
In this post I will share
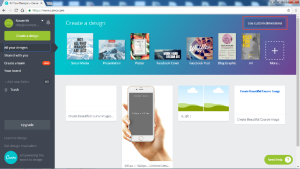
What is Canva.com?
How to create course images on Canva?
Guidelines for creating online course image
What is Canva.com?
Canva makes it easy for you to create your own professional course images, even if you’ve never created any graphics design earlier. Canva provides drag-and-drop functionality and lot of free templates. You can create images quickly which will wow your students without the price tag that comes with hiring a professional graphic designer.
If you do not already have a Canva account, you need to create an account before you can log in to Canva.
How to create course images on Canva?
Step 1: Gather course image requirements
Research is the first step in creating an effective image. From your research gather the follow requirements
Course Title
Background image or solid color
Content to be added in the course image.
After collecting all requirements, signup or login on Canva.com.
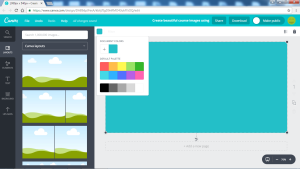
Step 2: Select the dimension to create an online course image.
The Image dimension specified for course image in learnyst is 1080px x 540px. On Canva click on use custom dimension, type 1080 x 540 and select px and click on design to create your custom course image. And your art-board opens up and now you’re ready to start designing the custom course image.
Step 3: Select the layout.
There are a variety of pre-built templates, that are suitable for subject matter. These templates allows you to add two or more different colours or images in the same image. For perfect course image I suggest you to use single solid colour. It’s important to find a proper template that suits the topic. Select the template and add the template by clicking on it.
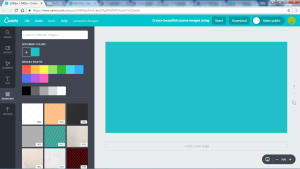
Step 4: Select the background of the course image.
For background you can add solid colour, images or you can upload any required image that you like. To add solid colour you need to select the image and click on the colour picker to add colour select the colour or click + symbol to add custom colour. You can add images by clicking on background option. Search for the required image or you can upload the image by clicking on upload option.
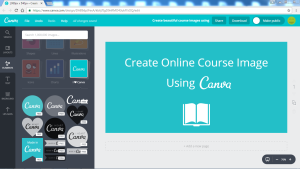
Step 5: Insert the selected information
You can add your logo, icons, text and images to your course image to make it look beautiful. Start adding heading by clicking on text and click on add heading and change the text. To add text with different style and font select the required text that is present in canva and change text has you required. To add image, icons and logo go to upload and click on upload my own image and upload your image and select the image and click on the selected image to appear on the art-board.
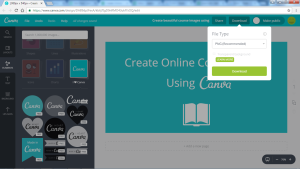
Step 6: Download the online course image
Image type of png is recommended for web image display purpose. Click on download select the file type that is to be downloaded and click download.
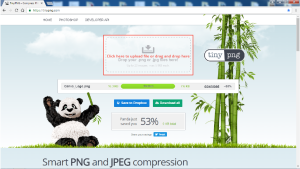
Steps 7: Compress the image
To increase your web page speed image size should be less. Reduce the image size by following the below steps.
The best part is you can instantly create, edit and turn your photos into artwork without signing up and for free. Here is the link to the colorcinch tool.
Once you are ready with your course images and contents, upload them on Learnyst and signup today for free.
A must-watch list of most beautiful online teaching websites of individual online teachers. Most inspirational designs for those willing to teach...
Ranjan
Apr 19, 2016
Get notified on new marketing insights
Be the first to know about new B2B SaaS Marketing insights to build or refine your marketing function with the tools and knowledge of today’s industry.
.png?width=600&height=346&name=Blog%20(15).png)